Glossy UV Coated Greeting Cards

  • Sizes *

  • Sides *

  • Weight *

  • Coating *

  • Blank Envelopes 6" x 9" *

  • Blank Envelopes 6" x 12" *

  • Blank Envelopes 10" x 7" *

  • Blank Envelopes 5.5" x 8.5" *

  • Scoring *

  • Artwork *

  • Quantity *

  • Turnaround Time *

  • Upload Files (Front) *

    Max file size: 100 MBPermitted file types: jpg jpeg jpe png gif pdf

  • Upload Files (Back) *

    Max file size: 100 MBPermitted file types: jpg jpeg jpe png gif pdf

  • Get Sheet Value *

  • Weight Calculation *

Glossy Greeting Card Printing Specifications:

Sizes Available:

  • 5.5″ x 8.5″
  • 6″ x 9″
  • 10″ x 7″

Material:

  • 14pt Card Stock

Sides:

  • Print Front Only
  • Print Both Sides

Coating:

  • UV Coating Front Only


Design Options:

We know you’re busy, so we want this process to be as smooth and efficient as possible. If you have a design in mind for you greeting card print, format your image as a PDF, upload it, and your greeting cards will begin processing.

If you would rather not design your own greeting cards, we offer in-house graphic designers who can send you several design options. You can be as hands-on or hands-off as you wish. If you have specific graphics, photos, or template ideas, send them our way. If you’d rather leave it up to us, just supply the text and we’ll provide the rest!

Cutoff time for all orders is 8:00 AM PST (Monday-Friday). Orders placed after cutoff time will be reconciled the following business day. Please note, turnaround time does not include Digital proof preparation.

Products Description:

Say Thank You With A Custom Greeting Card.

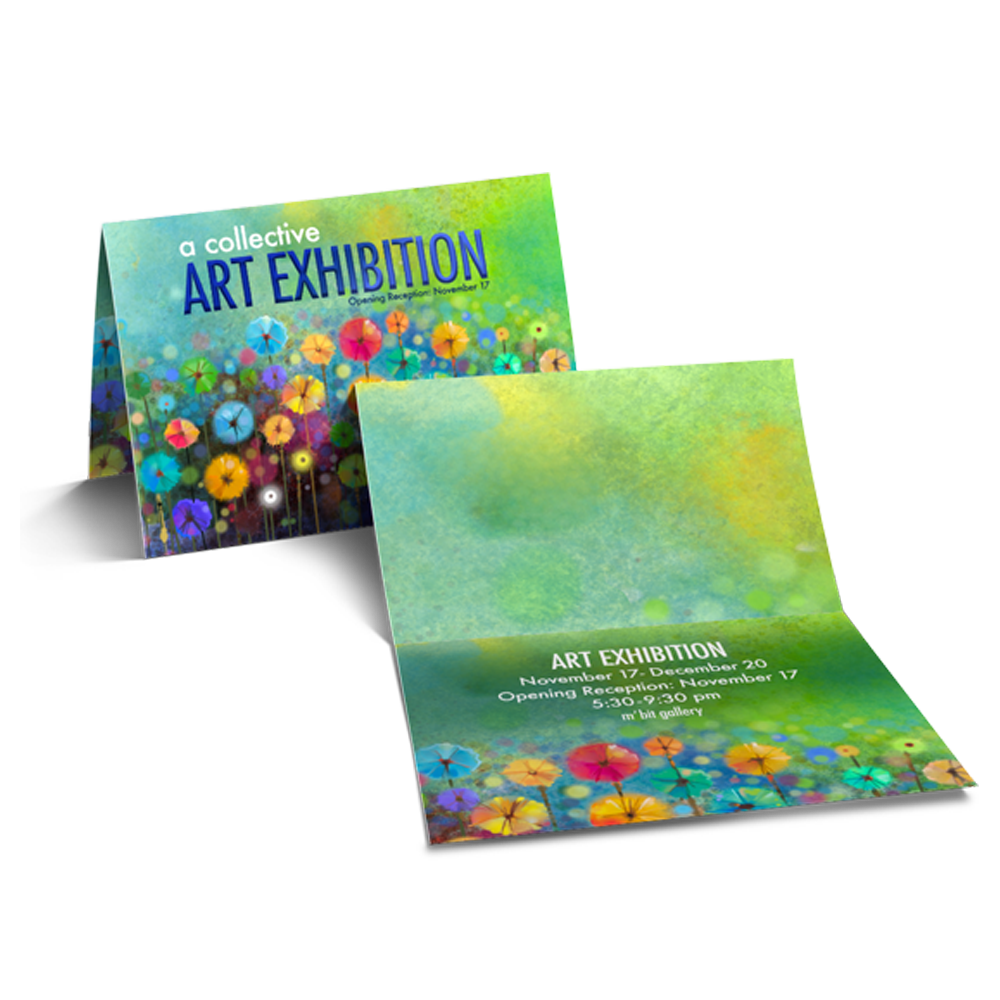
Are you looking to say thank you with a mailed greeting card? Our glossy UV greeting cards are a way to say hello, happy holidays or thank you! These personal cards are great to get your message across with something eye catching. Make sure that you create an impressive first impression with a greeting card that won’t be tossed but remembered instead.

With a variety of paper types to choose from at Guru Printers we know invitation printing. These folded over invitations or announcements have an ample amount of space to write a message. Companies and businesses use greeting cards to send mailers for upcoming specials, sales and events. Contact us for all of your Greeting card printing, Los Angeles needs.

Printing glossy UV greeting cards can create stunning and eye-catching designs that stand out.

  1. Design Creation:
    • Use design software like Adobe Photoshop, Illustrator, or Canva to create your greeting card design.
    • Choose the appropriate dimensions for your greeting card (e.g., standard sizes like 5″ x 7″ or custom sizes).
    • Incorporate vibrant colors, high-resolution images, and striking graphics that suit the occasion and grab attention.
  2. Selecting Paper Stock:
    • Choose a sturdy cardstock with a glossy finish for your greeting cards.
    • Opt for a heavier weight paper, such as 14pt or 16pt cardstock, to give your cards a premium feel.
  3. UV Coating Options:
    • UV coating is a clear, shiny coating applied to the surface of the paper to enhance its appearance and durability.
    • Choose gloss UV coating for a high-shine finish that makes colors appear more vibrant and images more vivid.
    • UV coating also provides protection against scratches, smudges, and fading, ensuring that your greeting cards remain in pristine condition.
  4. Printing Options:
    • Decide whether you want to print the greeting cards yourself using a high-quality printer or if you prefer to use a professional printing service.
    • Professional printing services can provide superior print quality, color accuracy, and finishing options like UV coating.
    • Research printing companies that offer glossy UV coating services and request quotes for your project.
  5. Preparing Files for Printing:
    • Ensure that your design files are formatted correctly for printing. Save them in CMYK color mode with high-resolution (at least 300 DPI) for optimal print quality.
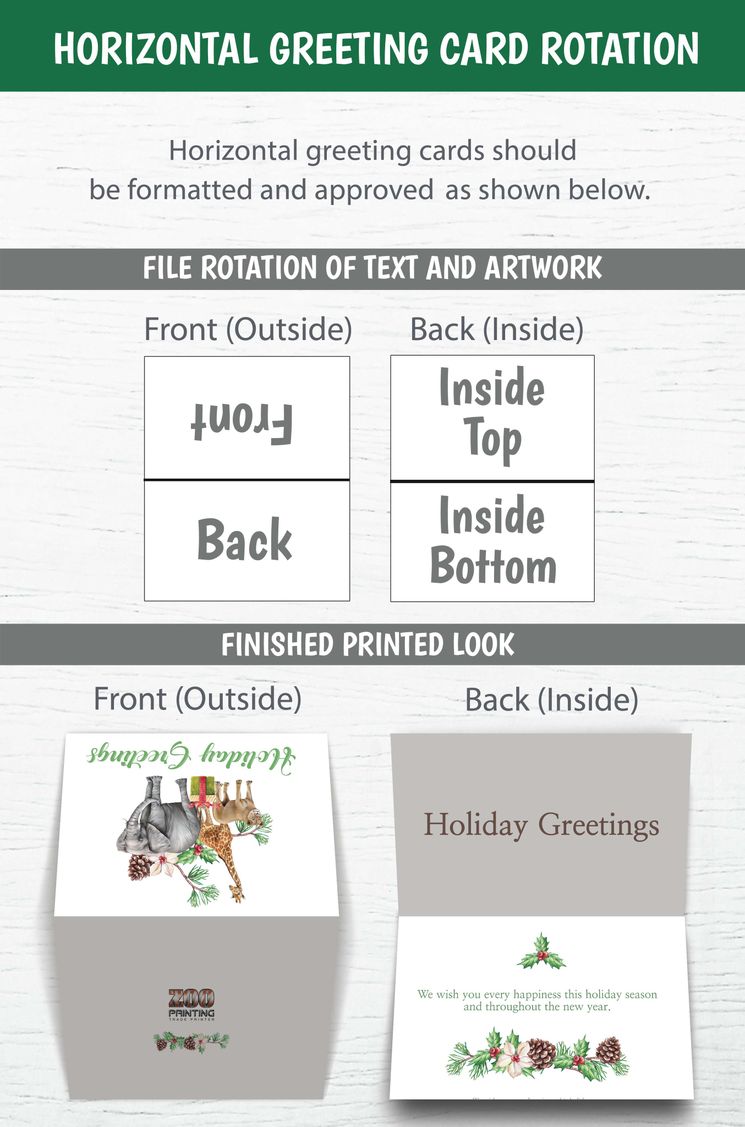
    • Double-check that your design is aligned correctly and that all elements are within the designated bleed area.
    • Specify in your file or instructions where you want the UV coating to be applied (e.g., specific images, text, or graphics).
  6. Ordering Printing:
    • Once you’ve finalized your design and selected a printing company, place your order for printing the greeting cards.
    • Provide the printing company with your design files and specify your preferences for paper stock, quantity, UV coating options, and any other customization requests.
  7. Reviewing Proofs:
    • Before proceeding with full production, review digital or physical proofs provided by the printing company to ensure accuracy and quality.
    • Check for any errors in text, color, or design layout and request revisions if necessary.
  8. Production and Delivery:
    • Once you approve the proofs, the printing company will proceed with production.
    • Depending on the printing method and quantity, production times may vary. Be sure to inquire about turnaround times and delivery options.
    • Once the greeting cards are printed and UV coated, they will be packaged and shipped to your designated address.
  9. Distribution and Use:
    • Upon receiving the printed greeting cards, inspect them for quality and accuracy.
    • Distribute the greeting cards to your intended recipients, whether they’re friends, family, clients, or customers, and enjoy the positive impact of your eye-catching and professional-looking cards.

By following these steps, you can successfully print glossy UV greeting cards that are visually stunning, durable, and perfect for any occasion.

Shipping Timeframes

California

shipping times based on Pacific Standard Time product shipping information
Guru Printers produces all orders respective to when they are processed and batched on the production queue. Although, we try our best to produce all orders accordingly based on your geographical proximity to a production facility, we cannot make any guarantees that your item will be produced out of a specific location.

File Setup

In order to ensure your files are print-ready, we recommend that you upload them in PDF format. When you generate a print-ready PDF, your computer will use the settings in Adobe Acrobat Distiller or any other PDF generating programs you may use. Please make sure that these are set properly before generating your PDF file.

If you are uploading PDF files created in Photoshop, please be sure all layers are flattened.

We also accept .JPG (JPEG), and .TIF (TIFF) file types, however PDF is the preferred format.

Check your file to make sure it meets our file creation guidelines. This will help speed up the production of your project and give your printed piece the best results.

  1. Use the CMYK colorspace (Cyan, Magenta, Yellow, blacK). These are industry standard printing colors. CMYK colors are different than RGB (Red, Green, Blue), which are used to display colors on your screen.
  2. Use a minimum resolution of 300 dpi for image files.
  3. Specify trim area with crop marks. (Don’t place crop marks inside the work area.)
  4. Artwork should have 1/8″ (0.125″) bleed extending past the trim line. This is to prevent minor cutting variations from leaving unintended results at the trim edge.
  5. Safe Area is the 1/8″ (0.125″) area inside the trim line. Do not put critical information or images within the Safe Area. This is to prevent minor cutting variations from leaving unintended results at the trim edge.
  6. If you want printed borders, they must be placed a minimum of 1/8″ (0.125″) inside the trim line and include bleed. This is to prevent minor cutting variations from leaving unintended results at the trim edge.
View our File Setup Templates