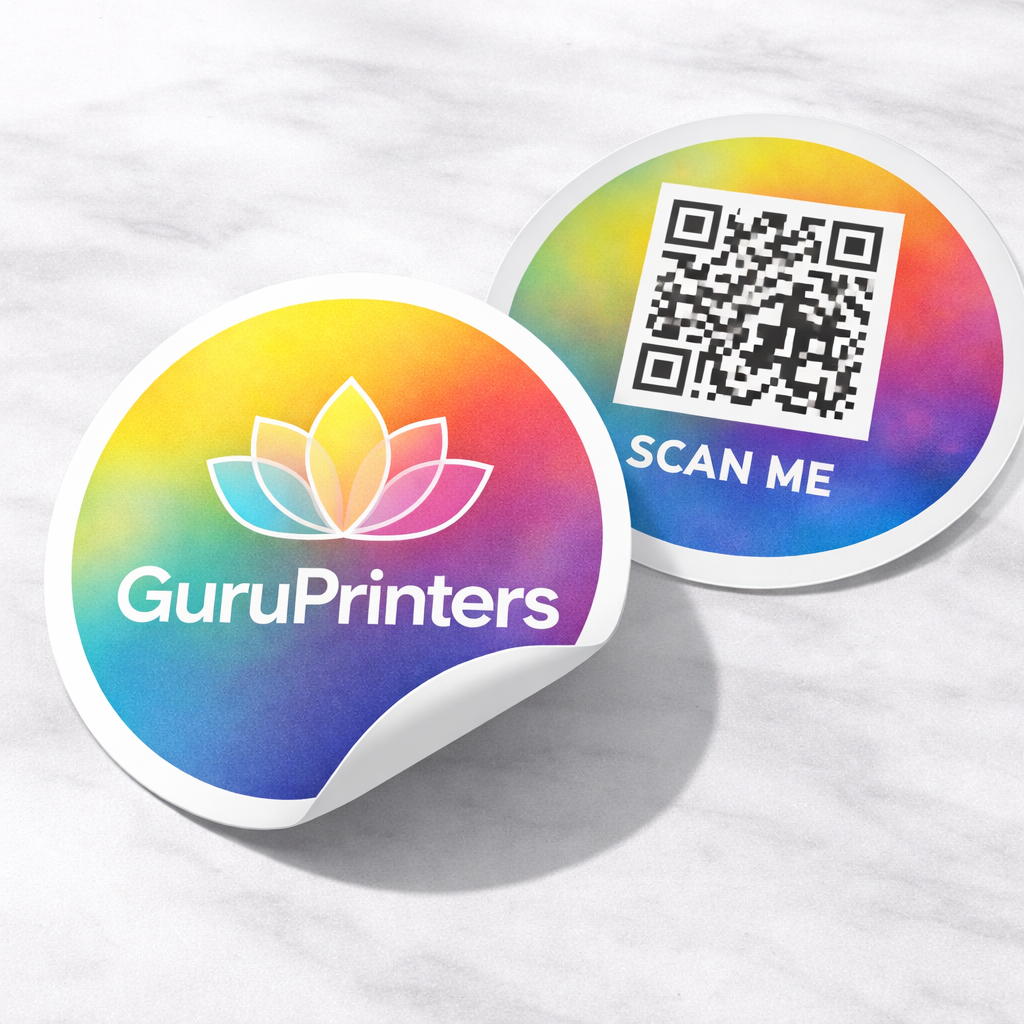
Double Sided Stickers: What They Are and Why People Use Them
Double sided stickers are made so your design shows clearly on both sides of the sticker. They’re a clean solution when you want a logo, message, or graphic to look intentional from either direction—without layering two stickers together or trying DIY hacks that end up misaligned.
If you’ve ever taped two prints back-to-back or struggled with one side looking reversed, double sided stickers are the more polished answer.
What are double sided stickers?
A double sided sticker is a sticker constructed so the artwork is visible from both sides. Depending on how it’s produced, the two sides can be:
-
The same design on both sides (great for logos and symbols)
-
Designed to read correctly from either side (important when there’s text)
The key is that double sided stickers are engineered as a single finished piece—so the result looks clean and professional instead of improvised.
When double sided stickers make sense
Double sided stickers are especially useful when:
-
You want branding that looks finished from more than one viewing angle
-
Your design includes text and you don’t want one side to appear reversed
-
You want a neat, durable result without having to align two separate stickers
They’re also popular for simple, high-clarity designs—logos, icons, symbols, or short messages—where readability and presentation matter.
Material options that affect the final look
Even a simple sticker can look very different depending on the material and print approach. The most common choices are:
Clear vs. white backgrounds
-
Clear can feel minimal and modern, with a “floating” look.
-
White gives stronger contrast and makes text bolder and easier to read.
Finish
-
Gloss tends to look vibrant and crisp.
-
Matte feels softer and reduces glare.
If you’re unsure, matte is often the safe choice for readability, while gloss is great for color pop.
Simple design tips (so it prints clean)
A few small choices make a big difference:
-
Use bold fonts if there’s text (thin type can disappear fast)
-
Increase spacing slightly—letters need room to breathe
-
Avoid ultra-fine lines unless the sticker is large
-
For small designs, keep it high contrast (dark on light, light on dark)
If your design includes a QR code, keep it large enough to scan easily and avoid placing it too close to the edge.
Ordering checklist (quick and practical)
Before you print, make sure you have:
-
Final design file (vector preferred: PDF, AI, SVG; or high-res PNG)
-
Correct size (width/height)
-
Quantity needed
-
Finish preference (matte or gloss)
If you want the best results, ask for a proof before printing—especially if there’s text.
- Hang Tags 6
- Booklets and Catalogs 12
- Save the Date Magnets 2
- Presentation Folders 6
- Bookmark Printing 4
- Door Hangers 3
- Postcards
- Brochures and Flyers 9
- Color and B&W Copies
- Table Tents 2
- Notepads 1
- Copy Services Los Angeles - Color or B&W 1
- Cut Vinyl Decal
- Die-Cut Vinyl Lettering
- Custom Packaging 2
- Event Badges and Custom Wristbands 4
- Custom Stencil 2
- Custom Wrapping Paper 1
- Same Day Printing 15
- Promotional Items 21
- Event Ticket Printing 1
- Calendars 1
- Standard Postcards 9
- Specialty Paper Postcards
- Premium Paper Postcards 5